Geometry → Geometrical entities window

Purpose · Steps · Inputs and units · Limitations · Related topics

Purpose

Browse geometry objects and named faces by category, control their visibility, and rename or delete individual entries.

Steps

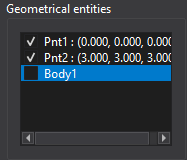
  1. In Geometrical entities, expand a category using the arrow beside it: Points, Curves, Surfaces, Bodies, or Named faces. The number in parentheses shows how many entries the category contains.

    Geometry entity tree with Points (7), Curves (4), Surfaces (1), Bodies (1), and Named faces (2); the named faces are inlet and outlet.

  2. Click a visible entry, such as Body5, inlet, or outlet, to highlight the corresponding object or face in the Geometry view.
  3. Use an entry's checkbox to show or hide that item. Use a category checkbox to show or hide all entries in that category. A partially checked category means only some of its entries are visible.
  4. To change a name, right-click an individual entry, choose Rename, enter a new name, and confirm.
  5. To remove an entry, right-click it and choose Delete. Check the remaining geometry and face assignments afterwards.
  6. Hover over a point, curve, or surface entry to see its available coordinate or geometry details in a tooltip.

Inputs and units

Input or valueMeaningUnits
Category and countPoints, Curves, Surfaces, Bodies, and Named faces. Counts include both visible and hidden entries.Integer count
VisibilityChecked: visible; unchecked: hidden. A partially checked category contains a mixture of visible and hidden entries.No physical units
Entity or face nameName used to identify an individual object or named face; changed through Rename.Text
Geometry detailsCoordinates and dimensions, where available in the entry or tooltip, follow the current Geometry length-unit setting.m or mm (SI); ft or in (Imperial)

Limitations

All help topics